 As for me, the car is amazing, and so is the fact that it's a masterpiece of just two neutral colors. I think that it teaches you that to make art, it doesn't matter if you have dozens of colors of just one. In fact, I feel that the fewer the amount of colors, the more interesting the piece looks. I just love all the small detail and effort that shows on every inch of the car. Now I want you to look at the picture below. Do you see the fine details between the arrows? See how the arrows just pop out from the rest of the piece. I feel that the car just has so much o look at, even though it is made up of only 2 colors. Now that I've told you my opinion about the car, I would like to hear your! Just tell me anything that you think about when you see the car, or what you feel is nice and unique about the piece in the comments below! That's all for now, bye!
Friday, December 28, 2012
Sharpie: Uncap What's Inside: #2
As for me, the car is amazing, and so is the fact that it's a masterpiece of just two neutral colors. I think that it teaches you that to make art, it doesn't matter if you have dozens of colors of just one. In fact, I feel that the fewer the amount of colors, the more interesting the piece looks. I just love all the small detail and effort that shows on every inch of the car. Now I want you to look at the picture below. Do you see the fine details between the arrows? See how the arrows just pop out from the rest of the piece. I feel that the car just has so much o look at, even though it is made up of only 2 colors. Now that I've told you my opinion about the car, I would like to hear your! Just tell me anything that you think about when you see the car, or what you feel is nice and unique about the piece in the comments below! That's all for now, bye!Monday, December 24, 2012
Sharpie: Uncap What's Inside
Tips:
 - Being a beginner, you might want to start with an old pair of shoes... just for practice.
- Think of something that you feel deeply about, or just freestyle! Either way, don't think too much, the results will just come together without you trying!
- Have a color combination that compliments each other, like the picture shown on the left. It will become easier now that you have at least an idea what colors you want!
-Every mistake you make can easily be fixed, just be creative!
Here's a video to demonstrate designing a shoe:
Thursday, December 20, 2012
Decorating the Christmas Tree
 Hello everyone! I'm back, with, finally another art related post! This tutorial that I'll be showing you today, is another Christmas related craft, and it is very much something that you can hang on the Christmas tree! This is also, coincidentally a green project, which can go a long way. I know that ornaments aren't very expensive these days, but wouldn't your tree be so much special with some homemade decorations? The ornament that I'll be showing you today, is very simple and takes about a maximum of about 5 minutes to make. The craft calls for a minimum of materials and is a perfect craft to keep kids busy. So if you want to make something like the craft continued, keep on reading.
I thought that this video that I found on You Tube was really interesting, especially since its such a green project. I really feel that the ornament gives a nice Christmas feel and it would be perfect for any tree. The materials that this craft calls for are probably just scattered around your house already! For the paper, anything is fine, from this paper that you decorate yourself, to spare Christmas cards. I hope you like this craft as much as I do, and hopefully try it out! Please let me know what you think about this post in the comments section below! That's all for now...Merry Christmas!
Tuesday, December 18, 2012
Christmas Classics: December Christmas Contest
Hey everyone, since Christmas is just around the corner, I decided that today I would talk about some amazing Christmas movies, some new, and some true classics. Where I live, Christmas means sipping hot cocoa, snow, and staying warm and cozy. So this holiday, curl up on your couch with a nice, warm blanket, some popcorn, and one of these amazing movies!
A Christmas Story
 Who can forget this hilarious classic! From Ralphie in the bunny suit, to the BB gun for Christmas, this movie was entertaining to everyone, young and old! First viewed in 1983, even in 2012, this movie is arguably one of America's favorite holiday classics! I know that many of you have a lot of memories attached with this movie, and I would like you to tell me your favorite memory in the comments below!
 Today however, I would like to talk about something that many of you may not know. A Christmas Story is now on Broadway, created by Peter Billingsley (Ralphie) himself! 'A Christmas Story: The Musical' runs through Dec. 30 at the Lunt-Fontaine Theater on 46th St., NYC. Take your family and go see it to make this an unforgettable Christmas. Who's playing the role of Ralphie, you may wonder. Well, according to Parade magazine, 12 year old Johnny Rabe will be standing on stage in the bunny suit. Here's what he has to say about his role: "It's cool to be playing such an iconic character. I mean a lot of people know Ralphie. They know the gun, the glasses, the cheesy smile, the daydreaming." From A Christmas Story: the book (published in 1966) to now "A Christmas Story: the musical" (now in 2012), I think that we can all agree that this story has come a long way in the past 46 years.
Elf
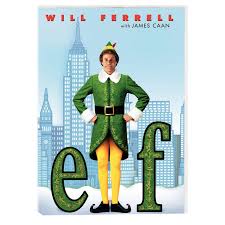 Just like A Christmas Story, Elf is another unforgettable holiday film, that has quite a bit of comedy as well. Ever since 2003, this film has filled houses with laughter during the holidays. This comedy holiday film stars Will Ferrell, James Caan, Bob Newhart, Ed Asner, and Zooey Deschanel. This 97 minute movie is available in stores such as Target, Wal-Mart, and Five-Below. I know that this film has become many people's favorite, and it just so happens that it's my English teacher, Mr. Poole is a big fan of this movie, too! I would like you all to watch this film and write a review of it in the comment's below!
A Christmas Carol
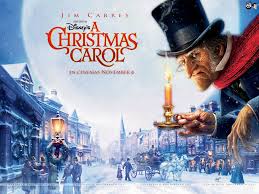 Who can forget Scrooge and the three ghosts of Christmas? Whenever you're in a bad mood, start this film to get into the true meaning of Christmas. From the book by Charles Dickens that started it all, there have been plenty of variations of this story. Whether it be the Disney, or the Muppet's version, you'll find the perfect version of this story for everyone! You can buy a version of A Christmas Story at places like Staples, Wal-Mart, Amazon, etc. I'm sure that most people have watched at least one version of this story, so I'd like you to tell me either a memory or a review of it! Remember to make sure you name which version of the movie you saw!
I hope my movie guide helped you, and hopefully you'll love the movies that I have posted about!
A Christmas Story
Who can forget this hilarious classic! From Ralphie in the bunny suit, to the BB gun for Christmas, this movie was entertaining to everyone, young and old! First viewed in 1983, even in 2012, this movie is arguably one of America's favorite holiday classics! I know that many of you have a lot of memories attached with this movie, and I would like you to tell me your favorite memory in the comments below! Elf
A Christmas Carol
I hope my movie guide helped you, and hopefully you'll love the movies that I have posted about!
Friday, December 14, 2012
A Moment of Grief
Information found from WNBC on television, and these two links:
http://news.yahoo.com/man-kills-26-conn-school-including-20-kids-212835177.html
http://news.yahoo.com/blogs/ticket/obama-statement-newtown-shooting-3-15-p-m-195212145--politics.html
Wednesday, December 12, 2012
Christmas Gift Ideas for the Family!
Christmas is just around the corner, and that means one thing: shopping for gifts! Now I know that shopping close to Christmas can be quite tedious, especially if you don't know what to get the person! So here's to everyone, whether you're doing Secret Santa, or you're shopping for your family, here's the perfect gift guide for you! The gifts that I'll be showing you going to be quite cheap (No more than $50), and at least one of them will be perfect for that person. Let's get started on our guide!
Gift Baskets: Mom, sister, friend
 Gift baskets are a great gift, especially if you fill it in with the things they love instead of getting a ready-made one! All you need is a (woven) basket, and some tiny little gifts/stocking stuffers (good things come in small packages!). Baskets can be found pretty much anywhere, and they range in sizes. Also, they're really cheap. I found one in Bath and Body Works for $6.50! Some things that you can place inside include body lotion, stuffed animals, chocolate, etc.
Edible Arrangements: Parents, adults
 How many times have your parents passed down chocolate because they want to stay "healthy"? Here's the perfect little treat for them, which is perfect for anyone with a sweet tooth! Edible arrangements, as many of you may know arranges fruit, some dipped in chocolate, others cut into shapes, and creatively decorates them and places them into a basket! Edible arrangements is a store, so you can either order from there, or online. There's actually one on my way to school, and it's definitely a place that I would like to visit! The picture above is an example of a fruit basket from edible arrangements. I think that this is an amazing and delicious gift to both give and receive!
Jewelry and Handbags: For her
Jewelry and handbags are a perfect option for any girl. Unlike clothes, it usually comes in one size, so you don't have to worry about that. Also there are many varieties and colors to choose from. For jewelry, you can get earrings, bracelets, necklaces, anklets, etc. And that too, it gold, silver, platinum, diamond, etc. I know there are many choices, but my favorite kind of jewelry is a locket. I have always loved lockets, and have always wanted one!
Handbags are also a great choice, which comes in many selections (cross body, tote, etc.). Some great brands to choose from are Vera Bradley, Coach, etc.
Giftcards: For him
I know that most girls always think that it's really hard to find gifts for boys, so I decided to make my last section of my post to be about gifts that would be perfect for boys. Straight off, when in doubt, I always go with a gift card. Some places that the gift cards could be from are Best Buy, Target, and Wal-Mart. Other gifts that you can give them are mp3 players, video games, and watches.
I hope my guide helped you all with your Christmas shopping! Bye!
Gift Baskets: Mom, sister, friend
Edible Arrangements: Parents, adults
Jewelry and Handbags: For her
Jewelry and handbags are a perfect option for any girl. Unlike clothes, it usually comes in one size, so you don't have to worry about that. Also there are many varieties and colors to choose from. For jewelry, you can get earrings, bracelets, necklaces, anklets, etc. And that too, it gold, silver, platinum, diamond, etc. I know there are many choices, but my favorite kind of jewelry is a locket. I have always loved lockets, and have always wanted one!
Handbags are also a great choice, which comes in many selections (cross body, tote, etc.). Some great brands to choose from are Vera Bradley, Coach, etc.
Giftcards: For him
I know that most girls always think that it's really hard to find gifts for boys, so I decided to make my last section of my post to be about gifts that would be perfect for boys. Straight off, when in doubt, I always go with a gift card. Some places that the gift cards could be from are Best Buy, Target, and Wal-Mart. Other gifts that you can give them are mp3 players, video games, and watches.
I hope my guide helped you all with your Christmas shopping! Bye!
Tuesday, December 4, 2012
Wordle Holiday Cards!
 Happy holidays everyone! I know it's a little early, but why wait for something so exciting? Now today till Christmas, I will be posting unique holiday gifts and ideas, to make this holiday a little more special. Now since this is my first post on this topic, I'm going to start with something easy...a card! A great gift for anyone is a card, especially when it's homemade because it came from your heart. Also cards are commonly made, but have you seen one like the one above? My guess is that you probably haven't, so if you want to learn how to make it, stay tuned!
Okay, So to create these amazing collages, read the instructions below.
1. Make sure that your computer has the latest version of Java software, because you will need it to do this. If you don't have it, update or get the newest version.
2. Click the link to get on the website: http://www.wordle.net/
3. Click create and choose a topic, in this case, Christmas.
5. If you want specific words to be bigger in the collage, type it once, then put a space and type the word exactly the same way. Every time the word is repeated, the bigger it will appear in the collage.
6. Once you're done, press go and your collage will come! You will be able to change font, the layout, the colors, the background, and much more!
7. Once you're done, you can choose to print it out, of share it with the web. For a card, just print it on half of the paper and then fold it so that one side has the collage and the other side is just blank. Just remember to have fun with wordle!
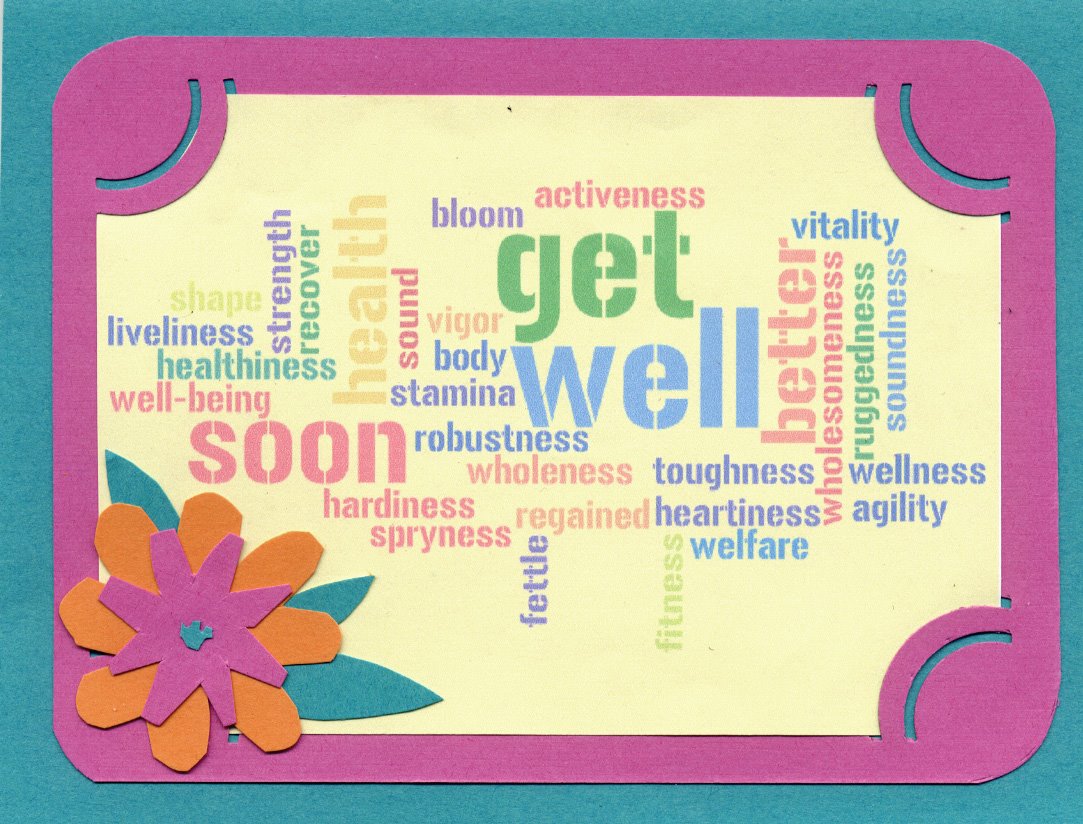
I hope that you guys enjoy wordle and use it again sometime, whether it be a birthday, a get well card, or just for fun! I think that many people don't make cards because they think they can't draw or write well, but this is just typing up! Also, the results are always neat and clean, and don't forget unique! I for one, have a lot of fun using wordle, and have made quite a few myself. Having experience, I would like to tell you that I truly recommend it to everyone! Please comment on you experience with wordle! That's all for now, bye!
Here's a wordle that I've made...
Saturday, December 1, 2012
Magazine Clutch!
Well, today I decided to do a craft that ties all my other projects together! Today we will be making a clutch out of recycled magazines! If you guys made any of my other crafts, then what better place to hold them in then a clutch you made by yourself! The magazines that we will be using can be whichever color you want, and as colorful as you want! Anyways, since the holidays are coming up, you probably are getting a lot of magazines, whether it be store catalogs or Parade magazines...and many of them, you probably don't want. So even though recycling them is great, why don't you reuse them and turn them into something cute, chic, and colorful? If you want to learn something totally unique and useful, stay tuned!
This video was found on You Tube by someone called TheBlissMiss so be sure to check her out if you enjoyed this video. I must say, that this tutorial surprised me on the results of this clutch! Also if you are looking for a quick little gift for the holidays, this is a great homemade gift for just about anyone! Honestly, the craft calls for a minimum amount of supplies so I really can't see why anyone wouldn't make it! Anyway, I hope that you liked this tutorial as much as I did, and I hope you comment to tell me what you think about my post. Also feel free to give me suggestions on my next post because I will be starting a new topic! That's all for now, bye!
This video was found on You Tube by someone called TheBlissMiss so be sure to check her out if you enjoyed this video. I must say, that this tutorial surprised me on the results of this clutch! Also if you are looking for a quick little gift for the holidays, this is a great homemade gift for just about anyone! Honestly, the craft calls for a minimum amount of supplies so I really can't see why anyone wouldn't make it! Anyway, I hope that you liked this tutorial as much as I did, and I hope you comment to tell me what you think about my post. Also feel free to give me suggestions on my next post because I will be starting a new topic! That's all for now, bye!
Sunday, November 25, 2012
Water Bottle Bracelets
Hey guys, so for this post I will be teaching you how to make another bracelet, but this time using a water bottle and aluminum foil. Other materials that will be in play are: liquid glue, a paintbrush, sticky 3-D letters, and black paint. I think that this craft is really cool, since the foil and paint give it more of a metallic look, plus this bracelet is customizable! This bracelet is very simple and quick... and the results are amazing! The video below is a tutorial by Cool2Craft so if you like this video, be to you check her out on You Tube. I hope that you like this tutorial as much as I do...enjoy!
As I had said before, I think that it's really neat that these bracelets are customizable. I think that it makes these unique pieces of jewelry perfect for any occasion (birthday gifts, Christmas presents, etc.). Plus, these bracelets can have names, be inspirational, etc. I really love this bracelet but the thing that I love most about it is that the aluminum foil and black paint give this a nice, antique look. Also, the crinkled foil and neutral color really brings out the letters and it's perfect for any outfit. I hope that you like this post and hopefully try this craft out. Please tell me what you think about this craft in the comment section below. That's all for now, bye!
Candy Wrapper Bracelet
 Hey guys, I hope that you all enjoyed Thanksgiving and Black Friday, but now I'm back to continue with my topic on recycled jewelry. Today's post will also be another bracelet...but this time, it will be using something that every kid loves...candy! Well, I know how many of you are in love with candy, so today we'll be using it's wrappers and creating it into a bracelet! Plus, since Halloween has just past, hopefully you still have some candy and didn't eat it all! Remember, I'm not telling you to just stuff all this candy in your mouth right now, but you can collect the wrappers gradually, or if you want to achieve the look above quicker, ask your friends and family to pitch in! I hope you all enjoy this tutorial as much as I do, and hopefully try this craft out!
Friday, November 23, 2012
Thanksgiving Parade!
 Hey guys so today I'm not exactly going to do a art post. Since yesterday was Thanksgiving, I'd first of like to wish you a very Happy (belated!) Thanksgiving, and I think that all of us have a lot to be thankful for. But remember, that there was also something else that happened yesterday: the annual Macy's Thanksgiving Day Parade! I for one enjoy this parade a lot, and enjoyed this year's parade as well. The only bad part of watching the whole parade is of course, waking up early, something that I'm incapable of doing! So of course, I just HAD to wake up ten minutes too late. Now in my opinion, the best part of every parade I'm going to tell you some facts on these amazing and eye-catching features in this parade.
I know that many of you love these balloons, but do you really know the facts about them? Today's post will be full of facts such as:
-As soon as the parade ends, they start preparing for the following year. Making the balloons is a year-round effort.
-Before, they used to inflate balloons the morning of the parade, for smaller audiences, today the Macy's day parade is watched by more than 3.5 million people live, and another about 65 million watch on television.
-Studio artists first mold the character sculpture using clay. Once it's finished and polished, a solid version is created out of plastic.
-The mold is divided into two layers. The inner section is placed directly over the clay and is made of a silicone rubber, which gives it a flexible hold, while the outer section is a rigid shell to cradle the inside.
-Than, two plastics are mixed together to create a cast model...the first model is done!
I know that a lot more work is needed for the balloon to be done, but I just decided to share some of these steps for you. I hope you enjoyed my post and learned something new! In the comments below, please tell me your favorite part of the parade yesterday! For more information, check out: http://www.history.com/
which, by the way is where I got information for this post from That's all for now...bye!
Sunday, November 18, 2012
Soda Tabs Jewelry!

Okay, so in my opinion, this bracelet is very cute, and definitely unique. By the way, you don't need to use blue ribbon, you may use any color that you want, and remember to just have fun with it! If you want a more colorful look, you may use colored soda tabs (or if you don't have any, spray paint of use nail polish if you want!) This bracelet is more of a casual look, and I really love the bow that ties the bracelet together...it really is eye-catching, and definitely my favorite part! The best thing about this bracelet is that it can be any color you chose, so it pretty much looks good with just about anything...as long as it's on the casual side. If you want some specific outfits that would go with this outfit, check out my friend Jade's blog at: findyourfashionhere.blogspot.com/
This bracelet really would tie just about any outfit together, and I hope that you end up trying this out! I hope you liked this tutorial as much as I did, so please tell me what you think in the comments below! That's all for now, bye!
This bracelet really would tie just about any outfit together, and I hope that you end up trying this out! I hope you liked this tutorial as much as I did, so please tell me what you think in the comments below! That's all for now, bye!
Thursday, November 15, 2012
Dart Painting!

I couldn't find a good video for you guys, so here's a few steps to teach this to you as simply as I can:
1. Have a couple of balloons ready. Take one balloon and fill it up with paint (fill it up to your desired amount).
2. Blow the rest of the balloon up to as big as your desire, and tie a knot. As you can see in the picture above, the balloons aren't fully blown up.
3. Repeat steps 1 and 2 with the rest of the balloons
4. Hold the balloons in front of or on the canvas (or tape balloon on if you want to play darts).
5. Pop balloons with something sharp, if you don't have darts, sharp pencils work.
6. Tada! Your masterpiece is complete! I hope you enjoyed it!
I hope you all liked my blog post, and maybe even try it out. Also, if you don't want to get messy, you may want to wear a poncho or something else waterproof to prevent paint to come in contact with your body. I hope you found dart painting interesting after you read this, but I'd like to hear your thoughts in the comment section below! Feel free to follow my blog and become a member! Keep updated for more fun tutorials for the upcoming week. That's all for now, see you later! Bye!
Tuesday, November 13, 2012
Hot Chocolate!
 Hey guys! So if you are looking at my title and wondering, no, we are not making hot chocolate today. Or at least not one that you can drink! Today you will make a knick-knack plushie (sorry, don't know what the real term is)! So anyway, this project is another Kawaii craft, therefore it is really cute! The video that I'm going to use is off of You Tube, and it's by TammyHallam, so be sure to check her out! Somethings that you will need for this craft are: felt (black, brown, white, and a color of your choice), scissors, needle and thread(brown, and the other color of felt you chose), and paper. Let's get started...good luck!
Sorry if you thought that this would be a tutorial for making hot chocolate! But if you still want to learn how to make hot chocolate, I know a really delicious recipe from my friend Maansi's blog: http://yummyrecipemm.blogspot.com/2012/10/ancient-hot-chocolate.html
Enjoy!
Sunday, November 11, 2012
Fishtail Braid
Hey readers, so I wasn't planning on doing this post but I had gotten a request from someone to do the fishtail braid, so today I'm going to be teaching it to you. A fishtail braid is more of a casual braid, and is a more simpler hairstyle to achieve. I will be showing you two tutorials on the fishtail braid. The first one will be the original one, and the next one will be a more fancy way of doing it. The tutorials are once again by bebexo, so if you like the hair tutorials that I've been posting, be sure to check her out on YouTube. I hope you guys enjoy the tutorials!
Okay, so the video above isn't sideways! Anyway, before you start I would just like to remind you that this isn't going to be the fastest hairstyle to achieve, so take your time. And remember, if it doesn't try the first time, don't give up, try it again. I hope that you all try this out and are successful. And remember that you can always accessorize to make this look your own! Feel free to comment and tell me what you think about this post. Don't forget to keep updated with my blog!
For the more fancier look, check out the link below. By the way don't be alarmed, just because it looks complicated doesn't mean it is complicated to do. I thought it was when I looked at it, but after I saw the video, it didn't seen that hard to do at all. A helpful tip that I can give you is that before you try this hairstyle, try the original fishtail braid. Trust me, it will help. That's all for now, bye!
Makeup...
 Hey guys! A few months ago, I saw a really cool tutorial on anime makeup, and I decided to share it with you! In my opinion, this is art, and mad skills! I think that most of you are aware of this video and most likely saw it. It's more of a Halloween tutorial (sorry, little late!). I think that this tutorial's very unique and I hope you guys like it! The video is by someone called Anastasiya Shpagina, a 19 year old Ukrainian girl who does tutorials for girls to achieve the anime girl look. So if you want to accomplish the look above, stay tuned!
Thursday, November 8, 2012
Sock bun Curls!
 Hey guys, today I am going to blog about sock bun curls. The sock bun is a very simple and quick way to get natural looking curls without using heat! This hairstyle is something that you will have results after about 6 or more hours. (I suggest doing it right before you go to sleep!) Some things that you will need for this hairstyle are: hair tyes, bobby pins, fairly long hair, and a sock (you'll see why). So, if you want to accomplish the look on top, keep reading! Enjoy!
Tuesday, November 6, 2012
Braids
 Hey everyone, I hope that you enjoyed my previous blog post, and tried it out. Today's hairstyles are going to continue with the theme: braids. Braids are always fun and cute, and there are so many different kinds, which you may not know of. For example, I bet that many of you hadn't have heard of a snake braid before my previous post. How about a fishtail braid? A waterfall braid? A two strand twist rope braid? A french braid? Some of these, you might know. Others, you probably don't. What I'm going to try to do today is make you aware of the different types of braids, and teach you how to do them. There are so many different types of braids; you may not like the usual three strand, but you're sure to love at least one of these unique new styles!
The two hairstyles that we are going to be working on today are the waterfall braid and the mermaid tail braid. The first hairstyle that we are going to be doing is by far the simplest tutorial that I've posted. In fact, if you know how to make a three-strand braid, then you'll be fine. This hairstyle is sure to be a success, so let's get started and make the mermaid tail braid. Some things that you will need is pretty long hair, a hair tie, and a few bobby pins. I hope you decide to try this out, good luck!
Sunday, October 28, 2012
More Hairstyles!
Well, Hurricane Sandy's coming up, so I thought that I'd show a few tutorials to keep you busy during the storm. I hope that you get to see them before the lights go out (if they do for you). Anyways, I hope that you liked my old tutorial and you plan to try it out. Today's tutorials are also by bebexo, and the two hairstyles that we'll be working on are the unique 4 strand braid (slide up), and the snake braid headband. Both of these hairstyles kind of overlap each other because they are very similar to each other since for both of these, you need to slide up the braid. Hope that these tutorials help, and that you achieve these cute and fun looks. Enjoy!
The first hairstyle that we are working on today in the unique four strand braid (slide up). This particular video really caught my eye while I was scanning through tutorials to show everyone, because it is definitively unique. With just a few easy steps, I think that this tutorial is really worth trying for anyone who wants a simple and quick hairstyle, and look amazing at the same time. I for one, have not tried this out yet, but after I watched the video, I've decided that I'm trying tomorrow! I hope this video helps! Have fun trying this out, and feel free to add accessories to make this look your own!
The next hairstyle that we're working on in the snake braid headband. As I've mentioned before, this hairstyle also uses the slide up technique, but I find it a little simpler. The reason that this is a little simpler is because this hairstyle uses the three strand braid instead, which most of us already know, unlike the four strand braid. These hairstyles are more interesting from the usual braid, and definitely more original. It's sure to get more compliments and a little more attention. I hope that you found both of these videos helpful and check out my blog soon! Also feel free to comment and follow my blog. That's all for now, bye!
Saturday, October 27, 2012
Weekend Topic!
 Hey everyone! I know that I haven't been posting a lot, but starting now, there's going to be a new topic every weekend, which will be the topic throughout the week. Anyways, since today's the weekend, my topic for the week is ... hair. I know, you're probably thinking that hair isn't very artsy, but for me, it is. Throughout the week I will be post tutorial and tips on hairstyles, with the help of one of my all time favorite YouTube channels and inspirations, bebexo. Bebexo has some great tutorials, and I'm going to share some with you this week. Enjoy!
The hairstyle that we are going to be working on today is the famous hair bow. One thing that you will need is hair at least at your shoulders (hair where you can make a pony tail). This tutorial is very simple, quick, and cute. Another great thing is that you don't need to really buy anything. All you need is a pony tail holder, a comb/brush, and a few bobby pins. By the way, this hairstyle is convenient for all of you who are being Minnie Mouse for Halloween. I hope all of you enjoy the tutorial as much as I did. Let's get started!
Wednesday, October 24, 2012
Mouth Art!
What do you think? Extreme art skills? Months for perfection? How long do you think that you would take to perfect this? Days, weeks, months? How about if you were holding the pencil in your mouth? Today I'm going to talk about Doug Landis, a mouth artist. Doug Landis is famous for doing the unbelievable: drawing with perfection with a pencil in his mouth His general topic is sketching animals, with incredible details. The picture above is an example of one of his pieces. Enjoy!
Information:
A high school wrestling accident rendered Doug Landis
a quadriplegic, paralyzed from the neck down. Concerned that Doug was spending too much time in front of the TV, his brother Monte challenged Doug to draw and placed a pencil in Doug’s mouth.Magic time. (Information from: http://bolstablog.wordpress.com/2011/04/17/teeth/ )My Opinion:
As for me, it's hard enough to draw a picture like that with my hands. With my mouth, it might as well be impossible! I think that Doug Landis is really a great example of a true artist. One who has made a career despite all the difficulties that he has faced. One who hasn't given up. I personally find Doug Landis truly inspirational and I for one, look up to him.
Extra:
How do you think Doug Landis does it? Here's a picture that I found of him at work. Amazing,

Sunday, October 14, 2012
New Topic!

 As you can see, these pieces of art aren't something that you can achieve at one shot (unless you are very lucky), but these take a lot of time, especially since they are 3-D. For most of us, it's already hard enough to make a three dimensional drawing on paper, but with chalk, you can't even erase anything. If you mess up, you will most likely have to cover it up as best as you can, or you will have to start all over. Looking at these pictures, how long do you think that it would take to complete something like this? Five, ten, twelve hours? Days? It's true, they take a very long time to complete, but by looking at these, all I can say is that it is all worth it!
What do you think about these pictures? Are they cool, unique, and incredible, or dumb, weird, and odd? Tell me what yo think in the comments below. Please follow my blog! That's all for now, bye!
Tuesday, October 9, 2012
Cinnamoroll Plushie!
I personally think that this video is very helpful, and I hope that you do too! As for materials, I think that all of them are available at a local drugstore as well as department, and (obviously) craft stores. Even though I have not tried out the plushie yet, it seems like a fun project that (hopefully) doesn't take very long to do. Anyone who plans to, or ends up trying this out, please let me know how it turns out in the comment box below! Don't forget to follow me and continue viewing this blog.
I know that I haven't blogged for a while, and I'm sorry, but that's not going to continue. I was just a little busy, but now I plan on blogging at least three times a week, so there's going to be something new very soon! Also, remember that my next blog is going to be the start of a new topic, so don't forget to check that out as well! That's it for now, bye!
Tuesday, October 2, 2012
Ice Cream!
Sweet Treats!
For those of you who liked my previous post, here's another hair accessory/pendant for you to work on! In this particular video, we will be working on a simple felt-made ice-cream cone. This video will use up more materials than the other video, but most of the
materials are house-hold items. Enjoy!
I personally love this video because the accessory is both very colorful, and easy to accomplish. The accessory is very fashionable and appeals to those who have a sweet tooth (like me!) As it says in the video, you can do many things with this felt. For example, you can turn it into a pendant for a necklace, attach it to a headband, glue it to a pin, etc. I hope you enjoyed this tutorial as much as I do, and try out this craft on your own. It's quick, cute, and cheap ... what have you got to lose?
Well, since my first video is about ice cream I decided that my second one should be, as well! This tutorial is going to be about: how to make a Kawaii ice cream cone plush from felt. This particular video is a little more challenging because it involves knowing how to stitch! For those of you who don't know how to stitch, I suggest that you ask someone to help instead of not trying this craft at all. I guarantee you, you will not be disappointed when you see the final results if they come out right!
If anyone tries out any of the tasks that I have blogged about so far, please let me know by commenting! Also, in the comments below, please write me any suggestions on what to blog about next! Don't forget to follow me! That's all for now, bye!
Monday, October 1, 2012
This week's Topic: Crafts!
Craft Time!

Hey readers, welcome back to a new week, new post, and most importantly, a new topic! This week, I decided to focus on crafting! Crafting is all about using materials, old and new, to make something great! From scrapbooks, to displays, crafting is everywhere! Today, I decided to start with something fairly simple. Today, we are going to learn how to make a bow out of ribbon like the one that you see in the picture above. This bow is a simple yet fun craft, and a cute accessory that matches with pretty much everything. Here are some materials that you will need to succeed in this craft: a roll of ribbon (I'd recommend 1 inch or thicker), a hot glue gun/fabric glue, and a pair of scissors. Let's begin!
This bow will take no longer than 10 minutes to be done. I love these bows because not only are they really simple to make, but they can also be used for so many different reasons! For example, if you attach it to a bobby pin, it becomes a hair clip; if you attach it to a headband it adds a little fun to it, and it you attach to ribbon, it becomes a belt! These bows can be in any color, design, or size you want. Choose your ribbon, and good luck!
Please comment and tell me how you liked the video and if you tried it out, keep me informed on how it turned out. Don't forget to follow my blog! That's it for now, bye:D
Sunday, September 30, 2012
Weekend Nails!
 Since it's the weekend, and many people have plans, I decided to do show you some quick nail art designs that aren't time consuming, and very easy and quick to do. Let's begin!
Marble Nails
Marble nail art may not be the quickest design, but it is definitely worth it! The picture above is an example of how marble nails turn out. To achieve the look, you will need: masking/scotch tape, two or more nail polish colors of your choice, a bowl filled with water(room temperature), and a toothpick. A cotton swab dipped in nail polish remover also comes in handy!Click on the link for a tutorial:http://www.youtube.com/watch?v=U7bwL2S7auk
Good luck!
Sally Hansen
 For those of you that have absolutely no time to even put on a simple base coat, the Sally Hansen Real Nail Polish Strips are for you! With these nail strips, you can have perfect nails in seconds! These nail strips last up to 10 days,and are easily removable with nail polish remover. Also, you don't need to wait for them to dry, and you can get them in 40 different styles! Here are three easy steps for applying these nail strips:
1. Take a nail strip of your choice and line it up with the bottom of your nail.
2. Press down on nail strip on all sides of your nail.
3. Yank off the extra nail strip and there you have it! Instant dry nails!
For more information, click on the link below.
http://sallyhansen.com/products/nails/nail-color/salon-effects-real-nail-polish-strips
Salon Express Nail Design Kit
Most of you have probably seen an advertisement for this on TV, but if you haven't gotten it yet, hit the stores! For just $9.99, you can get one scraper, one holder, and five design plates which you can use over and over again! From flowers, to stripes, to animal print, you'll have perfect nails in seconds! Here are some simple steps on how to use the product:
1. Take a nail polish color of your choice and apply it on a design of your choice.
2. Take the scraper and slide it across the nail polish. Grab the roller and place it upon the plate where your design is. Pick it up and check to make sure if the design is on the roller.
3. Roll the roller onto your fingernail.
Here's a link where you can purchase the kit: http://www.shopko.com/detail/salon-express-nail-design-kit/35248?gclid=CNup3pCv3rICFYuY4Aod8ngA5A#
All the links that I have posted, are also the links that I have used to get information. I hope this post helped you all! Please follow me and comment! That's all for now. Bye!
Since it's the weekend, and many people have plans, I decided to do show you some quick nail art designs that aren't time consuming, and very easy and quick to do. Let's begin!Marble Nails
Marble nail art may not be the quickest design, but it is definitely worth it! The picture above is an example of how marble nails turn out. To achieve the look, you will need: masking/scotch tape, two or more nail polish colors of your choice, a bowl filled with water(room temperature), and a toothpick. A cotton swab dipped in nail polish remover also comes in handy!Click on the link for a tutorial:http://www.youtube.com/watch?v=U7bwL2S7auk
Good luck!
Sally Hansen
 For those of you that have absolutely no time to even put on a simple base coat, the Sally Hansen Real Nail Polish Strips are for you! With these nail strips, you can have perfect nails in seconds! These nail strips last up to 10 days,and are easily removable with nail polish remover. Also, you don't need to wait for them to dry, and you can get them in 40 different styles! Here are three easy steps for applying these nail strips:
1. Take a nail strip of your choice and line it up with the bottom of your nail.
2. Press down on nail strip on all sides of your nail.
3. Yank off the extra nail strip and there you have it! Instant dry nails!
For more information, click on the link below.
http://sallyhansen.com/products/nails/nail-color/salon-effects-real-nail-polish-strips
Salon Express Nail Design Kit
Most of you have probably seen an advertisement for this on TV, but if you haven't gotten it yet, hit the stores! For just $9.99, you can get one scraper, one holder, and five design plates which you can use over and over again! From flowers, to stripes, to animal print, you'll have perfect nails in seconds! Here are some simple steps on how to use the product:
1. Take a nail polish color of your choice and apply it on a design of your choice.
2. Take the scraper and slide it across the nail polish. Grab the roller and place it upon the plate where your design is. Pick it up and check to make sure if the design is on the roller.
3. Roll the roller onto your fingernail.
Here's a link where you can purchase the kit: http://www.shopko.com/detail/salon-express-nail-design-kit/35248?gclid=CNup3pCv3rICFYuY4Aod8ngA5A#
All the links that I have posted, are also the links that I have used to get information. I hope this post helped you all! Please follow me and comment! That's all for now. Bye!
Subscribe to:
Posts (Atom)